- FastAPI Backend To Manage and Scale Microservice
- Geminin Pro Function Calling Streaming API
- OpenAI Assistants API
- A Simple NextJS 14 Frontend to test your MVP
- For python geeks a Streamlit Frontend to test your MVP
- Pydanitc and SQLAlchemy ORM to Save and Update Client Chat in Neon Postgress Database
Note: To locally run Gemini API Endpoints first setup your google vertex ai account
https://cloud.google.com/sdk/docs/initializing
This Travel Assistant Application is designed to test complete Generative AI Applications Scalable Architecture.
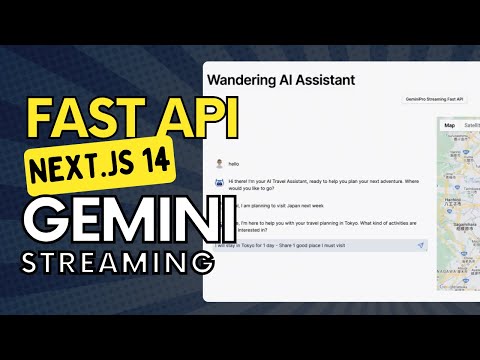
We have extensively explored gemini pro function calling, and open ai dev day features. The services are developed using FastAPI framework and the Frontend frontier is powered with NextJS 14 as well as streamlit for pure python devs.
The AI Powered Maps are powered with "Google Maps javascript API" for NextJS and "Plotly with MapBox" for streamlit.
In this video I have walkthrough the overall architecture and gemini pro streaming api pipeline, and function calling architecture.
- Open AI Assistants API Implementation
- GEMINI STREAMING & FUNCTION CALLING Implementation
gemmini => fastapi backend => nextjs frontend (fully streamed response)
- Interactive map to explore travel destinations.
- Real-time data fetching and display using FastAPI.
- Easy-to-navigate user interface with Streamlit.
Clone the repository to your local machine:
Rename .env.template to .env and add your API Keys and Database URLs there. Create an issue or feel free to message me if you face any issue while setting up the application
Install the required Python packages:
- Go to the
backend -> srcdirectory.
pip install -r requirements.txt
-
Start the FastAPI server by running:
uvicorn main:appTest the backend directly by making following POST request in PostMan or any API testing software.
http://localhost:8000/travel_assistant?prompt="Share 2 places to visit in UAE"
Ensure that both the frontend and backend services are running simultaneously for the application to function properly.
- Navigate to the streamlit directory containing
app.py. - Run the Streamlit application using the following command:
streamlit run app.py
Access the frontend at: http://localhost:8501/
Go to nextjs dir, run pnpm install and the pnpm dev
Pull te docker images and run there
With both the frontend and backend services running, access the Streamlit application in your web browser and interact with the travel assistant's features.
Let's create a docker image first and run the frontend using a container running from this image.
Next we will push the image and deply our backend on Google Run
- Build Docker Image
docker build -t travel_ai_service .
For Mac M2 Users use this command instead: docker buildx build --platform linux/amd64 -t <Image Name> .
- View your Image
docker images
- Run the Contianer for thus Image
docker run --env-file .env -d --name 2bd90a3c026f -p 80:80 travel_ai_assistant
- Tag Your Image and Push it on Docker Hub
docker tag travel_ai_assistant mjunaidca/travel_ai_assistant:latest
docker push mjunaidca/travel_ai_assistant:latest
- Deply your service on Google Cloud
Through Cli
gcloud run deploy ai-travel-assistant --image mjunaidca/travel_ai_assistant:latest
Then Go to Google Cloud and Click on "Edit & Deply New Revision"
Add your Environment Variables and change the port from 8080 to 80 (this is what we configured in dockerfile).
Or you can directly visit Google Run and click on Create a Service. Fill in the details to deploy your docker image
- Now Get your Google Deplyment URL and replace streamlit localhost:8000 port backend calls with it.
Firstly past the url in browser and you will see ""top here"" text. Next repalce it with streamlit
Get your Google Cloud Project Service API Keys. Download them in json format and store in the backend directory.
We pass them at runtime after building image to run the container locally.
Always include them in .gitignore and .dockerignore. ,I accidently exposed them docker hub before ***
- Build Docker Image
docker build -t travel_ai_service .
For Mac M2 Users use this command instead:
docker buildx build --platform linux/amd64 -t mjunaidca/travel_ai_assistant:v1 .
- View your Image
docker images
- Run the Contianer for thus Image
 docker run --env-file .env -d --name travel_ai_assistant -p 80:80 -v /Users/mjs/Documents/GitHub/genai_fastapi/travel_ai_service/backend/travel-ai-gauth.json:/app/travel-ai-gauth.json -e GOOGLE_APPLICATION_CREDENTIALS=/app/travel-ai-gauth.json mjunaidca/travel_ai_assistant:v1```

4.  Test Locally and then Push it on Docker Hub

Is API Working?
http://localhost:80

Are Gemini Endpoints Working?
http://localhost/gemini_streaming_travel_ai/?query=%22hello%22
http://localhost/gemini_streaming_travel_ai/mapstate


For OpenAi it's Post request using postman

http://localhost:80/travel_assistant/?prompt="Share 2 places to visit in UAE"
docker push mjunaidca/travel_ai_assistant:v1
5. Deply your service on Google Cloud

Through Cli
gcloud run deploy ai-travel-assistant --image mjunaidca/travel_ai_assistant:latest
Then Go to Google Cloud and Click on "Edit & Deply New Revision"
Add your Environment Variables and change the port from 8080 to 80 (this is what we configured in dockerfile).
Or you can directly visit Google Run and click on Create a Service. Fill in the details to deploy your docker image
- Now Get your Google Deplyment URL and replace streamlit localhost:8000 port backend calls with it.
Firstly past the url in browser and you will see ""top here"" text. Next repalce it with streamlit
Why not vercel: Vercel default inocation timeout is 10.01 seconds. Using edge we can increase it to 25 seconds and on top of it using streaming we can increase to to infinite time.
Here average response time with function calling is 30-40s so my plan is to dockerize and deply this on google cloud as well.
docker buildx build --platform linux/amd64 -t nextjs_travel_ai .

docker images

docker run --env-file .env -d --name 4f04288c45a8 -p 3000:8000 nextjs_travel_ai

verify the containor is running and no error occured

docker ps

docker tag nextjs_travel_ai mjunaidca/nextjs_travel_ai:latest

docker push mjunaidca/nextjs_travel_ai:latest

gcloud run deploy nextjs-travel-ai --image mjunaidca/nextjs_travel_ai:latest
Contributions to this project are welcome. To contribute:
- Fork the repository.
- Create a new branch (
git checkout -b feature-branch). - Make your changes and commit them (
git commit -am 'Add some feature'). - Push to the branch (
git push origin feature-branch). - Create a new Pull Request.
This project is licensed under the MIT License - see the LICENSE.md file for details.
For any additional questions or comments, please contact the project maintainers.
Enjoy exploring the world with the Travel Assistant Application!
Enjoy your virtual travel assistant experience!